
8 Easy Halloween Crafts to Make at Home: Spooky DIY Ideas


Halloween is the perfect excuse to get creative, whether you’re looking for a fun afternoon activity, making decorations for a Halloween party or creating something a little different to wear. From spooky jewellery to handmade decorations, there are plenty of Halloween crafts you can make at home without needing lots of specialist equipment.
The best part? Many of these projects use affordable materials that you can reuse for other crafts throughout the year.
In this guide, we’ll explore 8 Halloween craft ideas, including DIY bead bracelets, personalised accessories and simple decorations. Each project can be adapted to suit your style, whether you prefer traditional Halloween colours or something a little more subtle.
Affiliate disclosure: This article contains affiliate links. If you purchase a product through one of these links, we may earn a commission at no additional cost to you.
Halloween Crafts to Make at Home:
1. Make Your Own Halloween Bead Bracelets
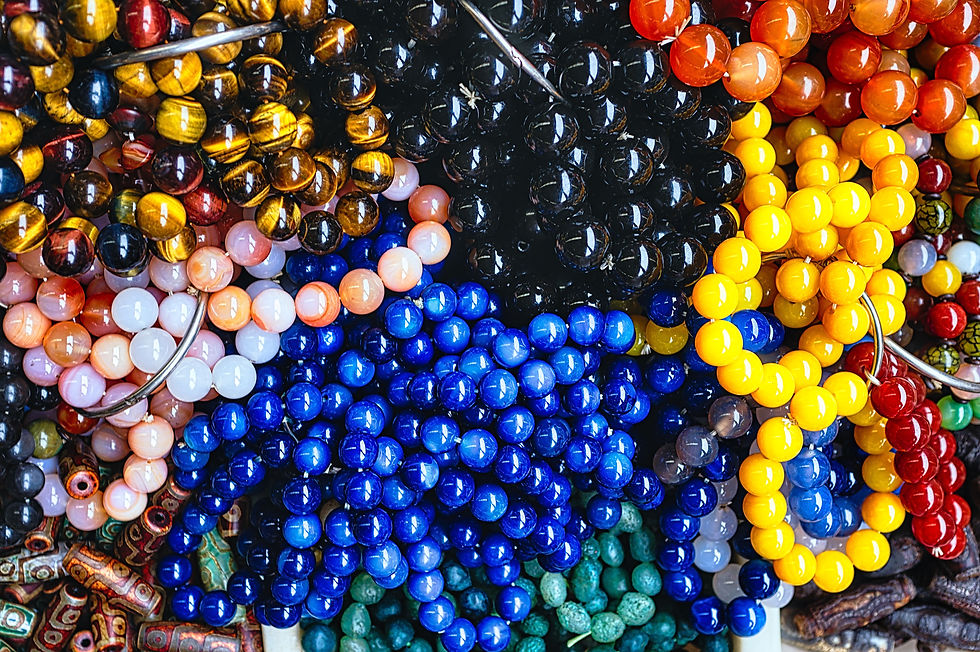
One of the easiest Halloween crafts to try is a handmade bead bracelet. With the right combination of colours and a few themed additions, you can create something festive without making it overly complicated.
Black, orange and purple are classic Halloween colours, but you could also use silver, dark red or green for a different look.
What you'll need:
Round beads in your chosen colours
Elastic jewellery cord
Halloween-themed charms, such as pumpkins, ghosts or bats
Letter beads, if you want to personalise your design
How to make it:
Choose a colour scheme for your bracelet.
Arrange your beads in a repeating pattern or mix them for a more random look.
Add a charm or spell out a word such as BOO using letter beads.
Thread the beads onto elastic cord, check the fit around your wrist and tie a secure knot.

You could make matching bracelets for friends or create several different designs to wear throughout October.
If you already enjoy jewellery making, this is also a good opportunity to experiment with different bead sizes and finishes. For example, polished gemstone beads can give a Halloween bracelet a more understated look than brightly coloured plastic beads.
Materials to explore: Halloween charm sets, alphabet beads, elastic cord and gemstone bead collections.

2. Create Spooky Halloween Earrings
You don't need to make an elaborate pair of earrings to achieve a Halloween-inspired look. Simple shapes and a carefully chosen colour combination can work just as well.
Ghosts, bats, pumpkins and crescent moons are all popular motifs. Alternatively, you could create a pair of earrings using black and orange beads for a more subtle seasonal accessory.

What you'll need:
Halloween-themed earring charms or pendants
Earring hooks or suitable earring findings
Small beads, if desired
Jump rings or other compatible jewellery findings
How to make it:
Choose a matching pair of charms or create two complementary designs.
Add beads if you want extra colour or texture.
Attach the charms to suitable earring findings.
Check that both earrings match in length and appearance.
For a more versatile design, choose black, silver or deep purple components that can be worn beyond Halloween.
Materials to explore: Halloween earring charms, ghost pendants, pumpkin charms and earring-making kits.
3. Make a Halloween Bag Charm or Keyring
If you'd like to try a jewellery-making project that doesn't involve making a bracelet, a Halloween bag charm or keyring is another simple option.
These can be attached to a handbag, backpack, pencil case or set of keys. They're also a good way to use leftover beads from other projects.

What you'll need:
A keyring blank or bag charm attachment
Beads in Halloween colours
A themed charm
Suitable jewellery cord or compatible connecting findings
How to make it:
Choose a focal charm, such as a ghost, pumpkin or black cat.
Select a few complementary beads.
Arrange the pieces into a short hanging design.
Attach them securely to your keyring or bag charm fitting.
You can keep the design simple with just a few beads, or make it more colourful with several different shapes and textures.
For a personalised version, add a letter bead or your initials.
Materials to explore: Keyring blanks, bag charm attachments, Halloween pendants and decorative beads.
4. Create Halloween Decorations Using Air-Dry Clay
Air-dry clay is a useful material for making small Halloween decorations without needing a kiln. You can shape it by hand and leave it to dry according to the manufacturer's instructions.
Try making miniature pumpkins, ghosts, bats or little hanging decorations for your home.

What you'll need:
Air-dry clay
Acrylic paint
Paint pens or suitable decorating materials
Ribbon or string for hanging, if required
How to make it:
Shape the clay into your chosen Halloween design.
Add simple details, such as eyes, a mouth or pumpkin ridges.
If you're making a hanging decoration, create a suitable hole before the clay dries.
Leave the piece to dry fully.
Paint and decorate it once dry.
You could make a small collection of matching decorations or create personalised pieces to give as gifts.
Remember that air-dry clay isn't automatically waterproof, so check the manufacturer's instructions if you intend to use a sealant or display your finished pieces somewhere damp.
Materials to explore: Air-dry clay, acrylic paint sets and paint pens.


5. Make a Spooky Halloween Garland
A handmade garland is an easy way to decorate a mantelpiece, shelf, doorway or party table.
Rather than buying a ready-made decoration, you can create one that suits your preferred colour scheme. Paper shapes are particularly affordable, while felt shapes can give the finished garland a softer appearance.

What you'll need:
Coloured card or felt sheets
Ribbon, string or suitable thread
Paper templates or Halloween shape templates
Glue suitable for your chosen materials
How to make it:
Draw or trace Halloween shapes such as ghosts, bats, pumpkins and stars.
Cut out several copies of each shape.
Decorate them with contrasting colours or simple facial details.
Attach the shapes along a length of ribbon or string.
Hang your garland where it can be displayed safely.
You could create an all-black garland for a more understated look, or combine orange, purple and green for a brighter decoration.
For a more personalised finish, add names or short Halloween messages to some of the shapes.
Materials to explore: Coloured card, felt sheets, decorative ribbon and Halloween paper templates.

6. Decorate Miniature Pumpkins
Pumpkins are a Halloween classic, but carving isn't the only way to decorate them. Painting miniature pumpkins can be a simpler alternative, particularly if you want decorations that can be displayed on shelves or tables.
You can use real miniature pumpkins or artificial craft pumpkins, depending on how long you'd like to keep your creations.

What you'll need:
Miniature pumpkins or artificial craft pumpkins
Acrylic paint suitable for the surface
Paint pens
Optional decorative embellishments
How to make it:
Choose a design, such as a ghost face, stars, stripes or a simple geometric pattern.
Paint the pumpkin in your chosen base colour.
Once the paint is dry, add contrasting details.
Leave the decoration to dry completely before displaying it.
Black pumpkins with white details can look particularly effective, while metallic accents can create a slightly different finish.
If you're using real pumpkins, remember that they won't last indefinitely. Artificial craft pumpkins are a useful alternative if you want to reuse your decorations next year.
Materials to explore: Artificial craft pumpkins, acrylic paint sets and paint pens.

7. Make Halloween Suncatchers
Halloween suncatchers are a colourful craft project that can be displayed in a window. When the light shines through the materials, the colours can create an attractive seasonal display.
You can make simple designs using translucent coloured sheets rather than glass, making this a more accessible project for home crafting.

What you'll need:
Translucent coloured craft sheets or tissue paper
Black card
Clear adhesive film or another suitable transparent base
Scissors
Templates for Halloween shapes
How to make it:
Cut a Halloween shape from black card, such as a pumpkin, bat or ghost.
Create an open area within the shape for the coloured sections.
Attach translucent materials behind the openings.
Add a hanging loop or use a suitable method to display the finished piece in a window.
Orange and yellow work well for pumpkins, while purple and green can be used for ghosts, bats and abstract Halloween designs.
For younger children, an adult should handle any cutting that requires sharp scissors.
Materials to explore: Translucent craft sheets, tissue paper, clear adhesive film and Halloween templates.

8. Make a Halloween Pendant or Necklace
If you enjoy jewellery making, a Halloween necklace is a chance to create something a little more distinctive than a simple bracelet.
You could use a single statement pendant or build a design from beads in seasonal colours.
The result can be bold and playful or subtle enough to wear throughout autumn.

What you'll need:
A Halloween-themed pendant or charm
A suitable necklace chain or jewellery cord
Beads, if desired
Compatible jewellery findings
How to make it:
Choose your main pendant, such as a moon, bat, spider or pumpkin.
Decide whether you want a simple pendant necklace or a beaded design.
Add complementary beads or smaller charms if required.
Attach the pendant securely and check the finished necklace before wearing it.
For a more understated look, try black beads with silver-coloured accents. For a traditional Halloween palette, combine orange, purple and black.
You can also make a necklace that works beyond October by choosing a moon, star or dark gemstone-inspired colour scheme instead of an overtly Halloween-themed pendant.
Materials to explore: Halloween pendants, necklace chains, jewellery cord and gemstone beads.

Where to Find Supplies for Your Halloween Crafts
You don't need to buy everything on this list to get started. Look at the materials you already have at home and choose one or two projects that appeal to you.
If you do need supplies, Amazon has a wide range of craft materials, from air-dry clay and acrylic paints to Halloween charms, alphabet beads and artificial pumpkins.
When choosing products, consider the quantity included, the dimensions of the materials and whether the items are suitable for your particular project. For jewellery-making supplies, check the bead sizes and hole dimensions before ordering so that they work with your chosen cord or findings.
You can also reuse leftover materials from previous craft projects, making these ideas more economical and reducing waste.
Final Thoughts
Halloween crafting doesn't have to mean complicated projects or expensive supplies. With a few basic materials and a little imagination, you can make personalised jewellery, seasonal accessories and decorations for your home.
Whether you choose to make a spooky bracelet, paint a miniature pumpkin or create a handmade garland, the best project is one you'll enjoy making.
Start with an idea that appeals to you, adapt it to suit your own style and see what you can create with the materials you have available. You might even discover a new hobby to enjoy long after Halloween has passed.


Comments